Have you always wanted to start a WordPress blog? Starting a WordPress blog doesn’t have to be a complicated process. Sure, you can spend weeks or even months building a complex website. Or, you can spend thousands of dollars getting a WordPress website designed.
While there’s nothing wrong with that, it’s more important than ever to get your website live with content. The earlier you do, the faster your content will start to get noticed by search engines. It won’t get massive traffic right away. But the content will be working in the background to start getting noticed.
That’s why a much better way to start a WordPress website is to get started with your setup and improve the look and feel over time. That’s what all of the most popular websites online did. Don’t believe me? Just type your favorite website into the Internet Wayback Machine Archive and you can see what it looked like at various points in time.
Way too many people wait for their website to look perfect before they go live. Successful people get started and improve from there. Here’s how to get started with your WordPress website in about 20 minutes.
The first step to having a blog to post to is finding a host for your website. I recommend A2 Hosting. It’s where I host almost all of my websites. (The ones that aren’t hosted there already had hosting when I got involved and I didn’t want to rock the boat… yet.)
Your host is the company that puts your website on the internet. You sign up for a hosting account and then build your website using their platform. When you’re ready to publish, they make it visible.
The most important aspects of hosting include security, customer service, and stability. You want your website protected from hackers and viruses. You want easy and helpful customer service. And you want a host that keeps your website working well and staying online. Some hosts have better reputations than others for these.
I’ve tried several WordPress hosting companies and have had the best experience with A2 Hosting. It checked all the boxes for me. When I first started I was using different hosting software and ended up with issues for the duration of my time with them.
Customer service, security, and ease of use were all problems I encountered before I made the switch to A2. Now, I can’t talk highly enough about A2, which is why I’m recommending it to you.
With A2, there are a few different plans you can choose from, but most people will only ever need their basic “shared hosting” plan, which starts as low as $2.99 per month.

If you choose to work with A2, we use, recommend, and love them.
Upon choosing your plan, you’ll be prompted to Register a New Domain. You don’t have to buy your domain from A2hosting. You could get it from other places and still use A2hosting.
I get all my domains from Namecheap.com because it comes with free privacy protection. A2 Hosting charges extra for that protection and you can use A2 Hosting with any domain you own. It doesn’t need to be purchased through A2 hosting. If you prefer to have it all in the same place, here’s how you do it.

Your Domain Name is what people will type into the address bar when they search for you. It’s what follows the www in a web address.
When you click check, you’ll see whether or not the domain you selected is available. If it isn’t, that means someone else already has that domain. If it’s unavailable, they’ll give you suggestions of domains that are similar and available. And if you like one of the suggestions, simply click “add to cart.” Or you can keep trying until A2 tells you your choice is available.

When you find a domain you want that is available, select continue and you’ll be shown the checkout summary.

If available, click “Continue” and configure your desired options and continue to checkout. You will get the lowest price if you sign up for three years. In this example, your one-year price would be $83.88 total, or $6.99 per month, and your three-year price would be only $107.64 total, or $2.99 per month. In other words, for $23.76 more, you could have your site online for the next three years.

Click “continue” and move to step 3 to setting up a WordPress website using A2 Hosting.
Now you’ll see the final breakdown of your price.

Click continue again; you’ll fill out your personal information, create an account, set up your security, and pay.
After creating an account, you should be automatically logged in. If you come back to this step a little while later you’ll just have to log in to the customer portal with the information you set up at checkout. Here are A2’s instructions on logging in.

From your Customer Portal, you can log into CPanel to install WordPress.
Under Services, you find your hosting package and select manage.

From there, just click Login to CPanel, and it’ll take you there directly.

In your CPanel page, there will be a tab for Softalicious App Installer. That’s what you’ll be using to install WordPress onto your site.

First, click on any one of the icons under the Categories tab (I clicked on Blogs, but any of them would work). That’ll take you to this page.

Then, click on the WordPress icon. It’ll take you here.

Click “Install Now,” which will bring you to this set-up page.

There are a few things on this page. First, most people will leave their domain Protocol at https:// or https://www (it’s whichever you prefer), then you make sure the correct domain name is in that field. You can update the items here later so don’t stress about finding the perfect Site Name and Site Description right now.
The Admin Account section is really important though. You won’t be able to change the admin username, but it doesn’t have to show on your website. Pick something you can remember, and then set your password and what you want the admin email to be. Admin@yoursite.com or yourname@yoursite.com or hello@yoursite.com are all popular options but they are also easy to guess. So you might set up a special admin email account you will only use for that purpose.
Then click Install, after a loading page you’ll get this page telling you your Install is complete!

Installing WordPress is what makes your site go live online. To edit the site in any way you’ll have to log in.
To get to your site login page, go to www.yoursite.com/wp-login. The /wp-login extension stands for WordPress login and is what differentiates your login page from your main domain page. You should see a screen that looks something like this:

You’ll log in with the Username and Password you set up when you installed WordPress.
In WordPress Dashboard, navigate to Posts and then click Add New.

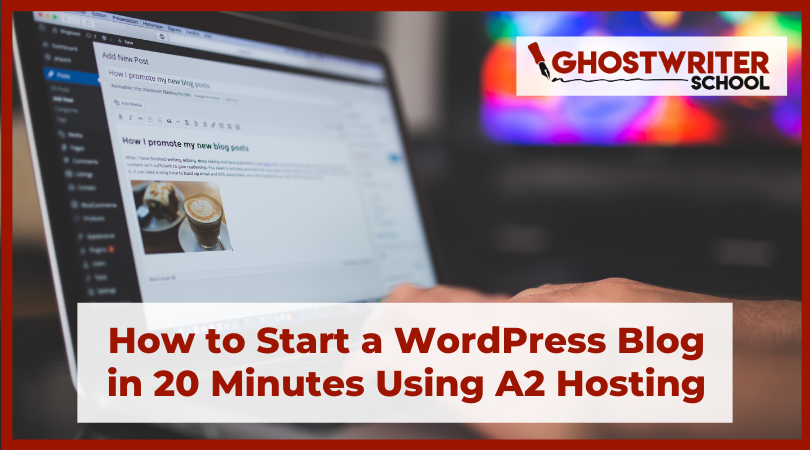
This will take you to a page to create a new post. It’ll look something like this:

Create a sample post just to play around with the WordPress functions and test that it publishes on your site. You can delete it at any time. And nobody will see it so don’t worry about it looking perfect.
From there, it’s just up to customizing your website. WordPress makes this really easy under the Appearance>Customize function on the sidebar; they have a new intuitive page builder where you can drag and drop, and edit as you see fit.
At this point, you can officially say you have a website of your own! It’ll still take some playing around to get your website just how you want it, but you can only move forward from here!
Now get started, head on over to Namecheap to get your domain, sign up at A2 Hosting for hosting, and start building your content empire!
And if you want to build a ghostwriting business, make sure you join our free Facebook group, Ghostwriter Growth, where thousands of writers are supporting each other in building ghostwriting businesses.